Showing posts with label cake. Show all posts

Monday, October 21, 2013

Raspberry Rose Buttercream White Chocolate Cupcake

I kid you not and it's pretty clear on my obsession towards cupcakes. Guilty pleasures in small dainty cups, frosted with any ultra smooth Swiss Meringue Buttercream flavour is simply irresistible. This week, I thought lets start the day off with RASPBERRY ROSE BUTTERCREAM WHITE CHOCOLATE CUPCAKE.

Thursday, April 4, 2013

After Eight Mint Chocolate Cupcake


A long to do list that needs to be checked off one at a time, and a much needed break is what I really need right now. Whenever, I become a little stress over something, I become over emotional. Over emotional eater that is. Not the kind that will cry my eyes out but will pig out. That's more of me.

So when my heart and tummy crave for chocolate, another friend of mine will call out to me; After Eight Chocolate Mints. The gooey minty centre coated with dark chocolate is simply irresistible. To pay tribute to my obsession towards chocolate and mint, it has to be these AFTER EIGHT MINT CHOCOLATE CUPCAKES.

Wednesday, March 6, 2013

Dark Chocolate Mousse & Hazelnut Rice Krispy Cake

Before we move deeper into the recipe, I contemplated a long time whether this should go onto my post. A simple reason really as I don't think I did enough justice to this decadent treat. You will understand better later. This is almost like 2 desserts in 1. A cake and a bar? No clue really, but I went ahead and called it a cake; although it didn't require any baking, and mixing any cake batter. As a child, I had always love those dainty chic looking cakes where they are usually paired with a genoise or hazelnut praline crunch which are then topped with fluffy flavoured mousse. So there I was in the kitchen, toying around with the idea of making a thick luscious layer of dark chocolate mousse paired with a crunchy base coated in hazelnut spread. Alas came DARK CHOCOLATE MOUSSE & HAZELNUT RICE KRISPY CAKE; certainly a watering mouthful treat. You will definitely love the layer of the Chocolate Mousse.

Tuesday, November 6, 2012

Orange Yogurt Cupcake + Chocolate-Butterscotch Ganache Frosting

Rain, rain go away.. come again another day? Rain, rain go away... so that I could go out and play! Damp air, gloomy grey skies, cold wind gushing, has left me spending most weekends buried under a pile of baking books, trying to get some inspiration. But all I could think of was not wanting to change out of my PJs, staying under my sheets of comforter, cuddling a fluffy pillow and go off to Neverland to dream. I recently realised that my blog and passion for food & desserts has been slightly neglected. Forgive me if I had gone MIA. I told myself that I needed to stay focus at work, and that's what I did. So there are a few back dated posts that will be coming right up real soon.

Was it only last week, that we celebrated Halloween? Anyways, I am starting this lovely month of November with early baked Christmas goodies. This is the easiest, tastiest and good looking ORANGE YOGURT CUPCAKE with CHOCOLATE-BUTTERSCOTCH GANACHE FROSTING with easy to make coral blush fondant toppers.

Monday, August 15, 2011

Baking Recipe: Amanda's Pink Rainbow Cake


I am so happy to introduce my sweet little niece to you. It was her big day, her Full Moon. Being an aunt [I felt older for a moment.. still young at heart nevertheless ;)] to her means I have the privilege to prepare her lots of good healthy meals and also to share with her my passion. I am recording this day for her and hopefully when she's older she will look back to know that she's a fortunate little girl who have lots of love from her family, where by her arriving in to this world has touched my heart.

For Recipe: click on image + zoom


Disclaimer: Picture courtesy from Pei Li's Miniature, please do not copy and reproduce, TQ.
For sweet Amanda, it has to be something special. The theme has to be pink for the cutest little girl, however I didn't want it to just be in plain pink. It has to be unique. The Pink Rainbow Cake is deeply inspired from another talented dessert blogger, Linda from Call-Me-Cupcake and also from Pei Li's Miniature. Pei Li has created a 1:12 scale miniature Pink Rainbow Cake and I thought this would be the perfect cake for my niece. We have been secretly planning on this, and this is my own version of Pink Rainbow Cake; plus it's edible. The cake has some what a chic flare to it. It's a classy simple vanilla cake frosted with vanilla butter cream. The design is simple with a surprise on the inside. It's a gradient of colour all related to the pink theme. The challenge to this little 6-inches, 5 layered cake was tinting the colour, as it's really tricky. Too much or too little will end up with a different colour once baked. To finish off the cake, instead of writing, I decided to make little flags with her name spelt on them and I feel this was the cherry on top of the cake. Enjoy!!

xx

Wednesday, June 15, 2011

Baking Recipe: Robin's Egg Blue Wedding (White Chocolate Chip Butter Cake + Vanilla Orange Buttercream)

Don't you just love the colour blue? And I mean not any colour blue.. to be specific Robin's Egg Blue. I really love this colour and found it to be rather calm, relaxing and adds some vintage flare.

Before it slip off my mind, to digress.. Lisa from Sweet As Sugar Cookies have invited me to join in the Treats Party. I've linked up 2 desserts of mine (Creamy Lemon Cheesecake and Scrumptious Strawberry Tarts). So go check out Lisa's website too if you love to get a sugar rush like I do.

Okay, now back to where I left off.. Over the weekend, I had a tiny project. Originally was to bake a 2 tier wedding cake, but I decided to make it a small 6 inches single tier cake with other tiny cuppies. Have not made those little ones in a while now.

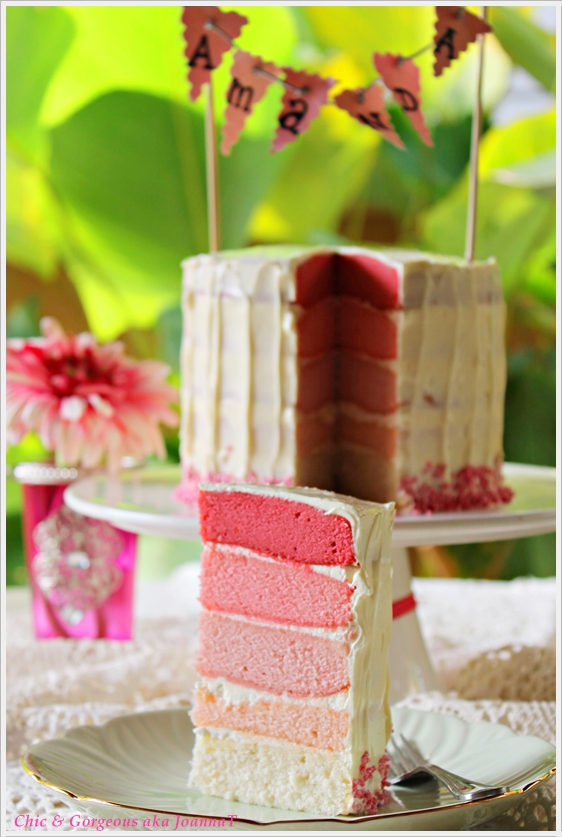
To be honest, I really had no idea on how to decorate. I sketched so many designs and at the end of the day, I didn't even stick to what I drew, typical of me...LOLs. Instead, I decided that the cake has to be rustic and full shabby chic-ness. No clue what to call the cake yet, but I thought "Robin's Egg Blue" sounds catchy. What do you think?

At the end, the designs were impromptu, and if you love a good white butter cake, read on for recipe. Enjoy!


Recipe

For white butter cake
adapted from Joy of Baking

2 large eggs, separated
1 3/4 cups sifted cake flour
2 teaspoons baking powder
1/4 teaspoon salt
1/2 cup unsalted butter, at room temperature
1 cup caster sugar, divided
1-2 teaspoon pure vanilla extract
1/2 cup milk
1/8 teaspoon cream of tartar
1/2 cup semi dark chocolate chips (optional)

To prepare white butter cake:

1. Preheat oven at 350 degrees approx 177-180 Celsius. Grease 2 6-inches round cake pan and line with parchment paper. With a whisk and clean mixing bowl, whisk egg whites until foamy. Then add in cream of tartar and 1/4 cup sugar and continue to whisk until stiff peaks forms. Transfer to another bowl, if you do not have a spare mixing bowl.

2. In a separate bowl, mix cake flour, salt, and baking flour together. Next, change to a paddle attachment, beat butter and remainder of 3/4 cup sugar at medium speed until light, creamy and fluffy.

3. Add egg yolks, one at a time, beating after each addition. Scrape down the sides of the bowl. Add the vanilla extract and beat until combined. Divide cake flour mixture to 3 additions, starting with milk and ending with flour and continue mixing until well combined.

4. With a rubber spatula, gently fold in beaten egg whites into cake batter, and fold until well combine. Toss in chocolate chips (optional) and careful to not over mix and lose all the air. Otherwise cake will deflate.

5. Bake for 25-30 minutes or until a skewer or toothpick inserted comes out clean. Set aside to cool before transferring to a wire rack to cool off completely.

For vanilla butter cream with hint of orange flavour

4-5 tbsp of orange juice (freshly squeeze)
3-4 cups of icing sugar (or just enough for taste of frosting consistency)

1 1/2 stick of unsalted butter
1/2 stick salted butter
2 tsp of vanilla extract
1 cup milk
5 tbsp all purpose flour

To prepare orange vanilla butter cream:

1. With a paddle attachment, whisk butter until light, fluffy and creamy.

2. Add in icing sugar a little at a time, as you may not need 4 cups of icing sugar.

3. Turn speed down to slow to add in orange juice and vanilla extract. Then turn the speed up again and continue to whisk until frosting double in volume, as it'll be light and fluffy.

4. In a saucepan, heat up milk but not to boiling point. Let cool slightly, then toss in flour all at once and stir vigorously, until milk and flour is incorporated. You will notice that the liquid will thicken up and return to stove and let mixture simmer, while continue stirring.

5. Once liquid is thicker, let cool for a couple of minute. With a sieve, press the thicken liquid through into the butter cream. Discard the lumps. Turn the mixer back up and whisk the butter cream for the last time for 2-3 minutes until well incorporated.

xx

Friday, May 20, 2011

Baking Recipe: Mr Persnickety (mint buttercream chocolate cake)


I just saw Elizabeth's comment asking "where have I been?" A shout out to Elizabeth... I'm BACK!!!! Well, I had a writers block. Not an excuse, but I was filled with so much work that my weekends became my lazy weekends.

Have you heard of Mr Men and Little Miss? I've always love these characters. They are just so cute and funny. My brother's birthday was back in March, and I thought to celebrate his day, I will bake him a cake. He loves to eat what I whip up or bake and has always been very supportive by giving me positive comments.

Since I've always spoilt my brother, it took me a while to piece the cake together. I'm from a family who LOVES chocolate cake expect for my dad who's the acceptional one. He's a cheese cake lover. Since it's not my dad's party,  obviously, I will make a rich and moist dark chocolate cake. The hard part was decorating the cake. It took me awhile but I recalled there's a character which fits my little brother really well,
Mr Persnickety. You'll see why later that this cake fits him.

This time round, instead of my Hershey's chocolate cake recipe, I decided to try out Martha Stewart's recipe which was published in her Living magazine, January 2009 her no# 182 edition.

Note: Now the recipe below is the original amount that is called for. For my cake, I've doubled up all the amount to make an 8-inches, 4 layer cake. This also includes the frosting. Otherwise Martha's recipe is ideal for just a single layer cake, or if you're an expert carver who can carve thinly in between layer, I will say 'kudos to you mate!'

Recipe:

For the cake

3/4 cup unsweetened cocoa powder (for my own cake, I used 3/4 dark cocoa powder + 3/4 dutch cocoa powder)
1 1/2 cups cake flour/ all purpose flour
1 1/2 cups sugar
1 1/2 tsp baking soda
3/4 tsp baking powder
3/4 tsp salt
2 large eggs, lightly beaten
3/4 cup warm water
1/2 cup whole milk
1/4 cup sour cream (since I had buttermilk, I substituted with butter milk)
1/3 cup unsalted butter, melted
3/4 tsp pure vanilla extract (for my own, I used approx. 2-3 tsp of vanilla extract)

To prepare dark moist chocolate cake:

1. Preheat over to 350 deg or approx 180 Celsius. Butter or use Wilton's cake release to coat an 8-by-12-inch cake pan. Line bottom with parchment.

2. Lightly whisk using a hand whisk to combine cocoa powder, flour, sugar, baking soda, baking powder, and salt in a large bowl. Then transfer to your stand mixer's mixing bowl. With a paddle attachment, mix in eggs, warm water, milk, sour cream or buttermilk, butter and vanilla extract. Keep mixing with medium speed until batter is smooth with no lumps.

3. Pour batter into prepared pan. Bake for approx. 35-40 minutes or a tester inserted into the center comes out clean. Let cake cool for a bit before transferring onto a wire rack to complete cooling.

Note: Cake will keep up to a week, if unfrosted.

For the frosting:

2 large white eggs
1/2 cup sugar
1 1/2 sticks unsalted butter, softened and cut into cubes
2 1/2 tbsp creme de menthe/ mint extract (go easy on the mint extract and taste along as you go until you reach your desired flavour)
1 tsp pure vanilla extract
1-2 drops of green food colouring (optional)

Note: To decorate, you can always opt for chocolate sprinkles, white sprinkles, Andes Creme de Menthe candies, After8 thin chocolates etc.

To prepare creme de menthe frosting:

1. Mix whites and sugar in a mixer bowl set over a pan of simmering water. Heat, whisking constantly until sugar dissolves for approx. 2-3 mins and mixture is warm.

2. Remove from heat. With a whisk attachment, whisk on high speed until stiff peaks form, for about 5 minutes. Add butter, several cubes at a time, whisking after each addition. Add creme de menthe, vanilla and food colouring, then beat for another 2 minutes, scrapping down sides of bowl when needed.

Enjoy!

xx

Wednesday, December 22, 2010

{Birthday Cake Project} A 'Summer Passion' Cake


** First stop.. don't forget, CHRISTMAS GIVEAWAY is still OPEN [<--click], so please help me to present the beautiful gift I selected for you foodies soonest possible. ;).

The past weekend was a busy weekend for me but a good weekend indeed. In fact it was a great weekend. I started celebrating my birthday on Thursday, where my colleagues gave surprised me with a Caramel Cheesecake, then on Friday {my actual Birthday}.. I had a wonderful breakfast with my best buddy, and then come Saturday evening my best buddy and the rest of the ladies took me out for dinner and then presented me with a Chocolate Ganache Cake called Four Seasons baked by another local blogger. What a sweet sweet weekend for me. I'll definitely try to post some shots of the lovely dinner we had.

me, myself & I making a really long wish
Apart from all the minor dining, I had my very first cake order to deliver which I hinted in my past posts. {Yeayyyyyyy!!} To be honest, I was filled with nerves as this cake that I'll be baking will be for my best buddy mom's birthday which happens to fall on 20th December. OMG.. talking about the chances of screwing up the recipe, the decoration etc.. There were 1001 things going through my head.

Luckily, my best buddy, Steph told me in advance. She gave me pretty much approx. 2 weeks notice and it's definitely a great head start for me. Coming up a with the cake flavour that I would think suit their taste buds was no different than coming up with a cake for my mom's 55th birthday., I knew they love citrus flavours. All I could think of was the island of Capri in Summer. That was my inspiration. To tie my whole cake together, the buttercream frosting and cake has to be white in colour, summer yellow curd and winter snow mascarpone cream and to decorate with lemon yellow pearls.

After much thought,the cake itself was a dense White Vanilla Poppy Seed Cake sandwiched with Lemon Curd and Light Whipped Mascarpone Cream and frosted with Limoncello Buttercream. I'm calling my cake Summer Passion Cake. What do you think?

Okay..you may think that there are lots of flavours but to my surprise it worked out really well. Firstly, I made a white vanilla cake and toss in poppy seeds. The sweetness of vanilla cake was balanced with tangy lemon curd and whipped mascarpone cream. Instead of using Limoncello Cream Cheese Frosting which I made previously, I've decided to change it to a buttercream with limoncello liqueur.


To decorate the cake..that was the tough part as I've never taken up any cake decorating class before. However, I did try my best to make it look as pretty I possibly can. I whipped up some royal icing and piped all sorts of sizes of pearls and left it out to dry. To bring out the lemon yellow I placed some fuchsia white chocolate pearls.

Summer Passion Cake
Most importantly, the end result is what counts. I've got a confirmation from my best buddy's mom that the cake is beautiful in and out. {Awww.. she's too kind.. brought tears to my eyes} So overall, the cake is DELISH and definitely worth having seconds or third helpings.

For dessert and cake order inquiries, please write to
chicgorgeousdesserts {at} gmail {dot} com

xx
Related Posts Plugin for WordPress, Blogger...